Service Hotline
0576-86011208
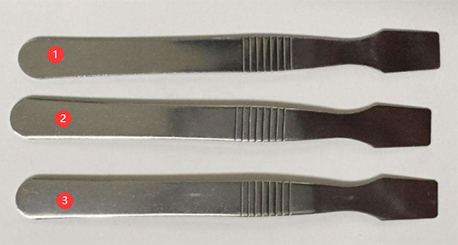
  • Iron block steel hardness test case
    1) Sample: Material is tool steel, thickness 2.6mm, 2.9mm, 3mm 2) Requirement: Test the Rockwell hardness value of tool steel sample 3) Test instrument and environment are high due to tool steel and heat-treated structural steel Hardness, Rockwell hardness test generally uses HRC scale, Rockwell diamond indenter, test force 150kgf. The R-150DT digital Rockwell hardness tester of Ebisu company used in this test, test Rockwell block 65.5HRC, the average value of five tests is 65.3HRC, the error is 0.2HRC, which proves that the accuracy of the machine is within the allowable error of the national standard Within the range, the sample can be tested normally. Laboratory test temperature: 32°C, humidity 46%. Rockwell hardness tester R-150DT Rockwell hardness tester R-150DT Rockwell hardness tester's tolerance and repeatability aA20~≤
  • Material hardness testing in the ceramic industry
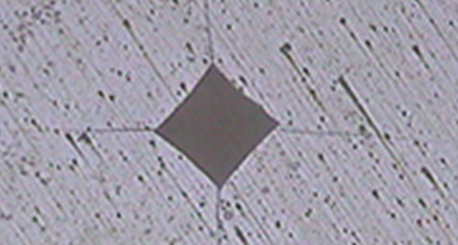
    1) Sample: the ceramic material sent by the customer 2) Requirements: the Vickers hardness value HV value and the Rockwell hardness value HRC value of the test material 3) Test instrument and environment This test uses the digital display of EBP Micro Vickers hardness tester DVS-1AT-8P. Before the test, the machine tested the standard hardness block 745HV0.5, and the average value of the five tests was 742HV0.5, which proved that the accuracy of the machine was within the allowable error range of the national standard and the normal test could be carried out. Laboratory test temperature: 25℃, humidity 35% Digital Vickers Hardness Tester DVS-1AT-8P 4) Test data on five points on the sample, the results are as follows: machine model test times test strength guarantee Time D1D2HV hardness value HRC hardness value DVS-1AT-8P10.5kgf 5 seconds 99.28298.597947.1767.6720.5kgf 5 seconds 98.597
  • Metal coating hardness test case
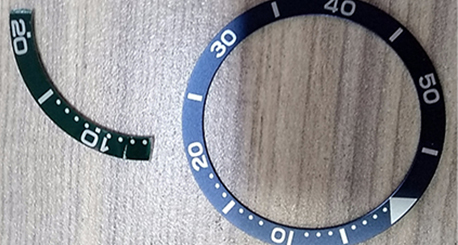
    1) Sample: Watch ring material, the matrix is ​​aluminum, the surface is electro-dye coating 2) Requirements: Test the hardness value of the surface coating 3) The test instrument and environment Because the coating thickness is very thin, the micro Vickers hardness tester is generally used carry out testing. This test uses the digital display micro-hardness tester DV-1AT-8P from Ebipro. Before the test, the machine tested the standard hardness block 636HV1, and the average value of the five tests was 633HV1, which proved that the accuracy of the machine was within the allowable error range of the national standard and can be tested normally. Laboratory test temperature: 25℃, humidity 40% Micro-hardness tester DV-1AT-8P4) Before testing, the whole surface of the material is not flat enough, if it is directly placed on the workbench, it is difficult to achieve no gap coupling, if the material and work The gap between the stations will cause the test result to be inaccurate and lose the reference value of the test. This type of material can be used for simple sample preparation: a flattener
  • Sapphire watch glass hardness test
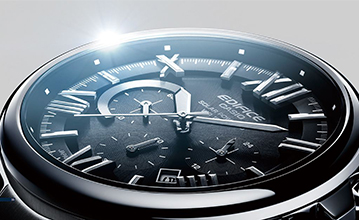
    Sapphire mirror is a kind of crystal mirror synthesized by artificial compression. Its advantage is high density and not easy to scratch. The hardness of the sapphire glass mirror is second only to the hardness of diamond, with a hardness of 2200-2300 (seven times the hardness of steel) and a Mohs hardness of 9, which has good hardness, good optical permeability, low friction, high temperature resistance, and better than crystal Glass mirror and synthetic glass mirror have higher wear resistance. Using it as a watch mirror, its sealing, strength and shock resistance are better than other materials. Therefore, the sapphire mirror has become an identifier for top watches. Of course, its high price is also expected. If it is a regular brand watch, the sapphire glass will generally be printed on the dial or back cover of the watch, indicated in English SAPPHIRE or Sapphire Crystal. But it also has shortcomings, that is, it is not shockproof, and it is not suitable for improper operations such as bumps, heavy pressures, and heavy falls. And glass one
  • Bright and dark field observation and polarized light observation application test of trinocular inverted metallurgical microscope
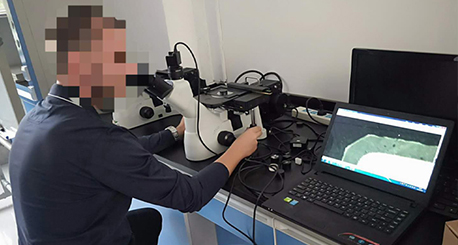
    1) Sample: Various material samples brought by European agents 2) Requirements: Different materials can get very clear pictures under bright field, dark field or polarized light observation. The software can automatically measure, rate, export reports, etc. 3) Test instrument and environment E-600 trinocular inverted metallographic microscope adopts an excellent infinity optical system and modular functional design concept, which can easily upgrade the system to realize functions such as polarized light observation and dark field observation. Total magnification: 50 -500 times, optional 100X bright and dark field objective lens, can achieve a total magnification of 50-1000 times. This test uses the E-600 E-600 trinocular inverted metallographic microscope plus ES-2018 metallographic analysis software system. The software and equipment have been calibrated before the test, and the samples can be tested normally. Laboratory working temperature: 20°C, air humidity: 30% 4) The screenshots of the test are taken by the customer because there are many samples brought by the customer, and some involve the privacy of the customer’s company.
  Add
No. 56, Danshan Industrial Zone, Wenling City, China 317523
  Phone
0576-86011208 / 13524552810
  E-mail
sales@hiebp.com
All employees of EBP strives for development by quality and survival by service. We sincerely look forward to establishing a good and long-term cooperative relationship with you.

Quick Navigation

Product Category

Copyright ©2020 EBPU ELECTROMECHANICAL EQUIPMENT (ZHEJIANG) CO., LTD. Technical support leadong