| Availability: | |
|---|---|
EVM-32CNC / 43CNC / 54CNC
EBP INSTRUMENTS
Shanghai, China
120 Sets Per Month
T/T in advance
1 Set
1. Application:
EVM-CNC Series is a universal type of CNC Video Measuring System developed by EBP Instruments. It has been widely applied in machinery, electronics, aerospace, automotive, military, mold, and other industries for precision automatic measurement.
Designed for rapid precision measurement & batch test in machinery, electronics, mould, etc.
1. To measure point, line, circle, arc and oval, rectangular and improve the accuracy with the multi-point positioning function with clear observation.
2. Coordinate measurement, translation and coordinates straighten out.
3. Make measurement data directly into AutoCAD drafting
4. Record user program, editing and execute command.
5. In metrology terms, the machine can test width, length, height, thickness, straightness, flatness, perpendicularity, circular degree, coaxiality, etc.
6. The machine can test products as below:
1) Machinery: sheet, mould & die, gear, turning parts like bearings, shaft.
2) Electronics: phone& tablet sheet, PCB, watch parts, etc.
3) Plastics: mobile phone camera plate, cover, front bezel, slide plate, etc.
2. Features:
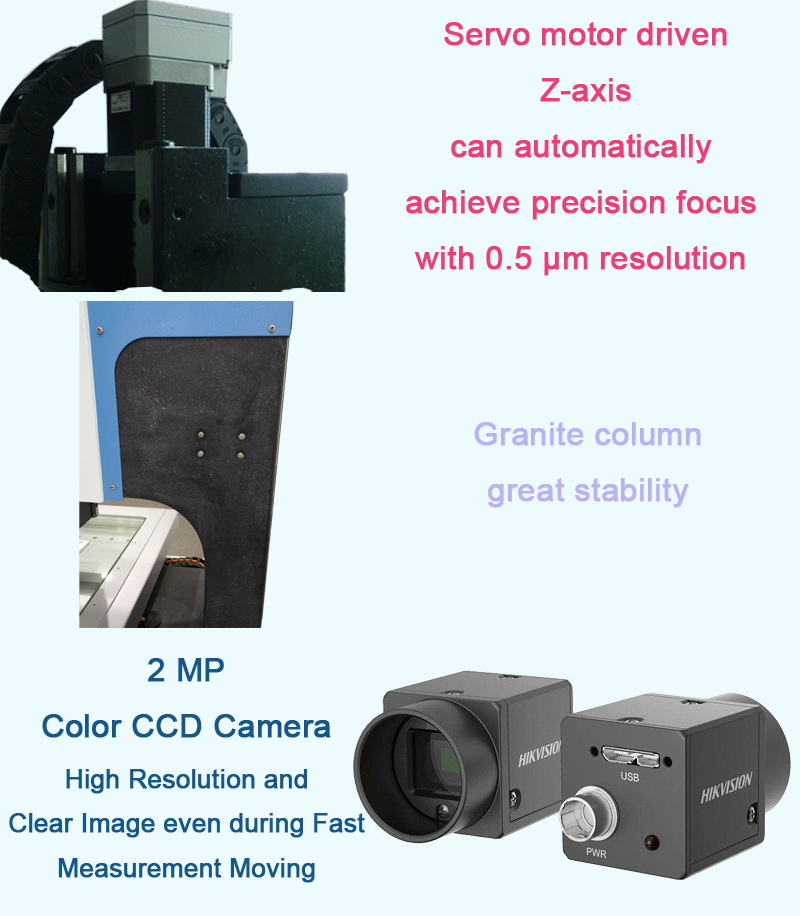
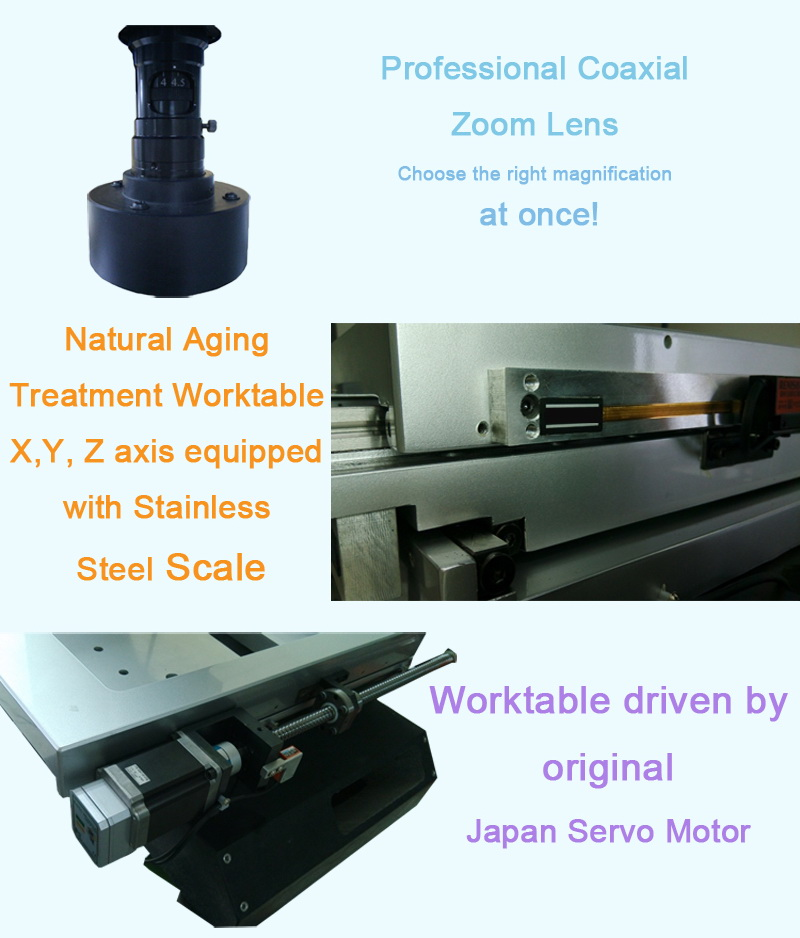
2.1. Double closed-loop motion control performs micron-level precision motion
2.2. 8 regional LED surface light source
2.3. Grade 00 JINANQING granite base, column, high stability
2.4. Specific CNC software has wonderful measurement efficiency.
3. Technical Specification:
Model | EVM-32CNC | EVM-43CNC | EVM-54CNC | |||||
Worktable | Worktable D(mm) | 500*330 | 606*466 | 706*566 | ||||
Glass Table Size(mm) | 350*280 | 450*350 | 550*450 | |||||
X,Y Stroke(mm) | 300*200 | 400*300 | 500*400 | |||||
Load Capacity | approx. 20 kg | approx. 30 kg | approx. 35 kg | |||||
Resolution | 0.5μm | 0.5μm | 0.5μm | |||||
Accuracy E1* | Ex, y ≤ (3.0+L/200) μm | |||||||
Accuracy E2* | Exy ≤ (3.5+L/300) μm | |||||||
Accuracy E3* | Ez ≤ (3.5+L/150) μm | |||||||
Z Stroke (mm) | Standard | 200 | ||||||
Option | 250~300 | 250~350 | 250~450 | |||||
Instrument Weight (kg) | 250 | 325 | 500 | |||||
Dimension (mm) | 610*764*992 | 720*950*1020 | 800*1040*1020 | |||||
Motor | Three-axis Max. Velocity | X,Y: 400mm/s Z: 200mm/s | ||||||
Three-Axis Positioning Accuracy | 0.001mm | |||||||
Imaging System | Camera | 2 MP Color Camera | ||||||
Zoom Lens | optical manual zoom lens | |||||||
Zoom Lens Magnification | 0.7-4.5X | |||||||
Video Magnification | 28-186X | |||||||
FOV | 11.1-1.7mm | |||||||
Power Consumption | 600W | |||||||
Instrument Accessories | 1X Tube (standard) | 0.5X Tube (optional) | WD | |||||
Zoom Lens | 0.7-4.5X | 0.7-4.5X | ||||||
Extra Lens | Video Magnification | FOV | Video Magnification | FOV | ||||
0.5X(option) | 10X-64X | 22-3.4 | 5X-32X | 44-6.8 | 175 | |||
1.0X(standard) | 20X-128X | 11.1-1.7 | 10X-64X | 22-3.4 | 92 | |||
2.0X(option) | 40X-256X | 5.5-0.9 | 20X-128X | 11.1-1.7 | 36 | |||
* All data is tested according to Standard ISO 10360-7-2011
L is measured length (units: mm)
Specification subject to change without notice
Measurement software system:
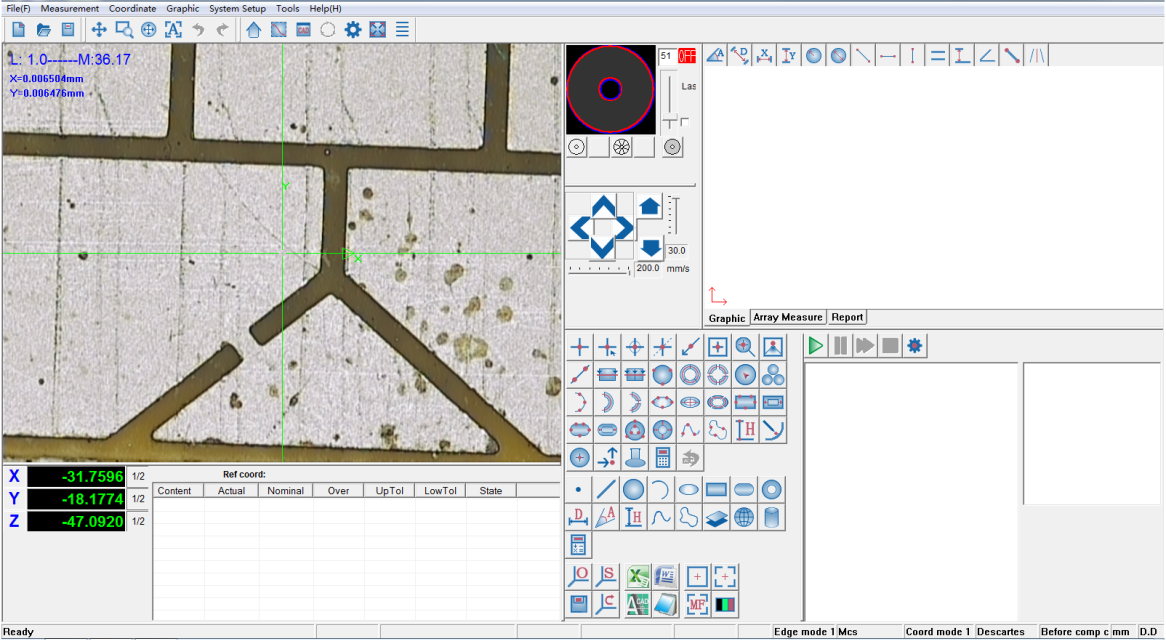
With user-friendly UI, powerful functions, it allows the users to achieve fast and precise geometry measurement.
1. 2D and 3D Measurements: can measure height, width, length, both sides of the angle, the cone angle, diameter, chamfering, straightness, flatness, roundness, cylindricity, perpendicularity, parallelism, inclination, etc.
2. Auto Focus: can automatically find the clearest point with focusing in Z axis.
3. CNC Programming Measurement: the user can set a click parameter, automatically measurement according to their demand (batch measurement, raise efficiency and save time)
4. Max. and Min. Limit: can set max. and min. limits, when the actual size of the product is out of range, the corresponding measurement data will have warning in red background.
5. Reverse Engineering: software draws measurement graphics, can have real direct entry into AutoCAD, also can be saved as DXF, dwg. files(can be a fast scanner, more than two times faster than general software speed).
6. Picture output: measurement or observation results can be saved as pictures in various format like BMP, Jpg.
7. Real-time sub-pixel to find the point: the first sub-pixels, advanced image processing technology into video measurement industry, greatly improves the measurement accuracy and measurement efficiency of a pixel, compared to similar software, saves at least 3/5 time, improve the accuracy of more than 2 times (in the same optical magnification).
8. Vector drawing functions: the image or fonts can be zoomed in or out steplessly.
9. Maps measurements: can capture and form a complete picture of large workpiece and directly measure on the graph.
10. The command line: directly form the command line, enter the coordinate information to generate the point, line, circle, arc, to meet the special needs of virtual measurement.
11. Line position tolerance: roundness, straightness, parallelism, perpendicularity, concentricity, etc.
12. Dimensioning Function: radius, diameter, angle, linear dimensions, alignment annotation, text annotation, etc.
13. Automatic Measurement Functions: automatically find a straight line, multi-zone, click circle marquee round, round multi-zone automatic arc.
14. SPC Statistical Analysis: CA, CP, CPK and the DRL, DRR, DR, MAX, MIN, AVG, the RANGE, the STD can be calculated, and can draw the XR diagram, line charts, bar charts, etc.
15. Data Report: measurement results can be directly converting to EXCEL, Word, CAD.
16. Language: support Chinese, English, etc.